Building a Reusable Snow Fence
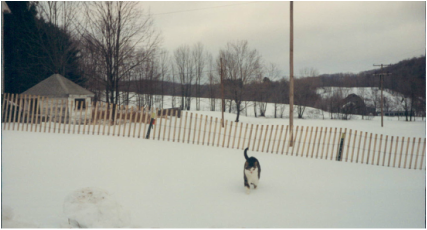
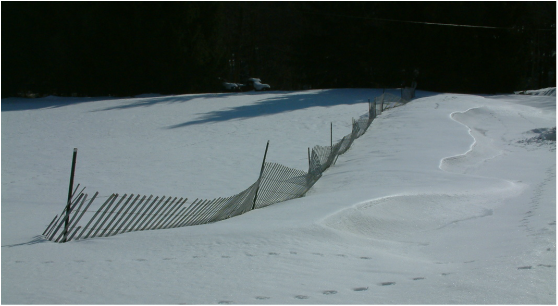
In an earlier web post, we discussed the advantages of erecting a snow fence every year. Most people don’t appreciate how much work and effort a snow fence can save them. For a brief explanation, visit that post at
http://www.countryforcity.com/about-snow-fences.html
In fact, many municipalities are exploring using crops as natural snow fences to save fuel and snow plowing hours on long streches of roads
http://kwqc.com/2016/11/11/clinton-county-farmers-use-corn-as-snow-fences-to-help-drivers-this-winter/
and
http://www.tristateneighbor.com/news/crop/corn-rows-stand-tall-for-road-safety-during-winter/article_626fe632-b0e5-11e6-b43f-57058bca4d5f.html
We are not getting any younger, and pounding 5 foot steel garden stakes into our very rocky ground (and getting them out in the spring) was becoming very taxing. If, like we do, you have a long stretch of driveway to protect- or landscaping you don’t want smothered and winter-killed. It makes sense to make a system that is easy to erect and remove each year. It is more work the first year, but much less in years to come. So we found it very much worth the effort to install the system a few years ago. The amount of time and exertion we saved in the next couple years made the extra work all worthwhile!
Erecting the fence
You will need a post to support the fence about every 10 feet (~3 meters). Typically, these are steel 5 foot garden posts to support a 4 foot tall fence. The fences usually come in 50 foot rolls, so you will need 6 posts for one roll (one anchor post to begin and then 5 more). For a longer continuous run, just add more posts
It is important to drive the posts in with very little wobble. A loosely driven post will fall down during the course of a winter, as the winds slap the fence back and forth and works it free. (This is part of the reason for the system we describe below, as driving posts into our rocky soil usually resulted in loose, crooked posts.) Securing the fence to the post can be done with plastic ‘zip’ ties or basic utility wire, but a wind slapping the fence back and forth, will slowly break everything down.
The pounding of the posts and their Spring time removal was always more time and effort than we wanted, so we devised a renewable system. You can improve upon it and change the materials as you see fit, but this was the easiest and cheapest, reusable way we conjured. The point is to put a system in place, that is easily re-installed and removed the next year.
An easy to erect and remove snow fence
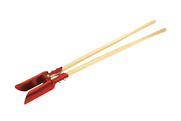 Manual Digger
Post Holes
To set a system in place, first start with the post holes. You want to make permanent holes in the ground which you can reuse effortlessly every year. They need to mate closely (no wobble) with the posts they will support.
To make these permanent post holes, you’ll need to dig a hole 12-15 inches deep (30- 45 cm). Use a manual or powered hole digger/auger.
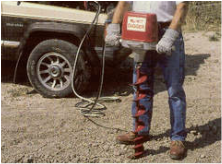 Powered Digger
You will need an anchored sleeve to support the fence post. The post should fit very tightly in the sleeve when erected, to avoid ‘wind slapping’ failure. For our situation, the cheapest and easiest solution was plastic pvc (plumbing) pipes. They are light, easy to find, easy to cut and drill, and won’t decay. We had to adapt to make a tight anchor hole-to-post fit, as the pipes we had available were only a loose fit. So we cut chocks to make a tight fit for each anchor hole and post. Perhaps you will have a better solution to share with us?
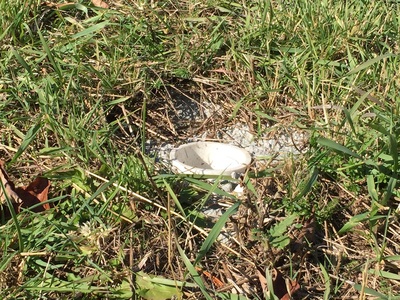
We used our farmer’s post hole auger, to dig holes for our 150 foot fence. The holes should be about 14-15 inches deep and 8-10 inches wide. We then set into each hole a 3" ID x 12” long section of schedule 40 grade pvc pipe. We made sure each piece was vertical and then filled the surrounding gap with concrete. Note: a form for the concrete isn’t necessary, the rough edges in the hole will be knitted together with roots and harder to work loose. Fill the bottom of the hole with small rocks or gravel for drainage so that your anchor pipe (sleeve) will rest just about one inch above grade. Leave the bottom of the pipe open for water to drain out. Otherwise, freezing water will cause the pipe to burst or prevent the removal/placing of a post. If this area is an area where you regularly mow a lawn, check the blade-to-surface clearance on your mower and then set the anchor pipe height accordingly so you can still mow without hitting the pipe.
Then fill in around the pipe with cement to grade, leaving the bottom of the pipe open for drainage. Again, a form isn’t needed for the concrete, as the surrounding roots will eventually knit together with the rough concrete.
Then fill in around the pipe with cement to grade, leaving the bottom of the pipe open for drainage. Again, a form isn’t needed for the concrete, as the surrounding roots will eventually knit together with the rough concrete.
Fence Posts
For us, the next smallest pvc size to fit was 2" ID diameter, to make the posts. It is not a tight fit, so if you have a better solution, please share it with us. These were the materials readily available for us and we used them. So we adapted our design by making chocks to insert in each anchor pipe for a tight fit.
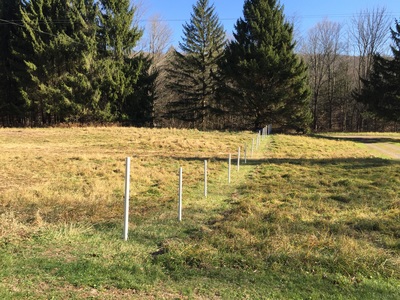
We bought 20 foot long sections of schedule 40 , 2 “ internal diameter (ID), pvc plumbing pipe and cut them into 5 foot sections. For each post, we drilled holes at 4“ and 24” down from the top, and installed 3" shaft eye bolts for attaching the fence to each post. (This matches up to the height of the wire runs on the wood and wire fences we buy here. You only need to attach the fence at the top and a middle point wire runs. The fence resting on the ground will keep the bottom in place.
Snow fences typically are made of wooden vertical slats bound together by 3 to 5 wire runs. So you should check first where the wire runs are located relative to the post, so that the eye bolts line up with the wire runs to attach the fence. Attaching to the wooden slats will lead to failure as they are thin and will break. We have tried the plastic snow fences that are rolls of grid-like plastic. They are light and easy to handle, but in our experience they usually are shredded to pieces in one or two winters and don’t last, and therefore much more expensive in the long run. Our wood and wire fences last generally 10 years or so.
Next make a renewable attachment. Take 12- 14 gauge utility wire- which most hardware stores carry, and cut a 10 inch piece for each eye bolt. Then, gripping one end of each piece with a needle nose pliers, make 2-3 turns of the wire around the nose of the pliers. This creates a spiral which you can turn onto the eye bolt and then crimp the spiral tight. It will remain attached now to the post so that you aren’t looking for wire every year. This gauge of wire is stiff enough that one or two turns around the fence's wire run will hold the fence tight all winter, and you won’t need pliers to attach and detach the fence each year! In fact, this system is designed so that NO TOOLS are required to erect and remove the fence and it is done in a fraction of the time and effort a normal fence requires.
|
|
|
|
|
|
In this design, the posts and anchors are not a tight fit, which is critical! Loose posts being slapped back and forth over the course of a winter by the winds, will work almost any anchor free.
(Think about it. When you want to take a post out of the ground, typically you grab it at the top and wrestle it back and forth to loosen it enough to pull it out. Over months, the wind will do the same thing, so a tight fit is essential.) For us, this was easily solved by making chocks (ours are plastic, but wood is fine). For our applications a 1 1/2 " x 1/2 " x 14 " long chock for each post made a tight fit. (We made the chocks 14" (2" longer than the anchor pipes (sleeves) so that they could be grabbed above the hole to pull out in the Spring).
And that is all you need. It used to take us most of a day, and many tools, to put up and remove our snow fences. It was exhausting work. Now, with a one-time effort to create the system done, each year it takes only about 30 minutes (and no tools), to do the same thing, and the physical effort is very small.
For us, saving almost a day, twice per year and not exhausting ourselves, was worth all the effort on the front end. Thsi system will last us for many years!
